How to set up a printer without a disk. We connect the printer to the computer
Despite the fact that installing a printer on a computer is not complicated, many users often can not cope with the first time. This is caused by different types of connection and some features associated with the definition of a printing device. Almost all modern devices connect directly via usb port, but it is often necessary to connect the printer via a serial port or wireless networks.
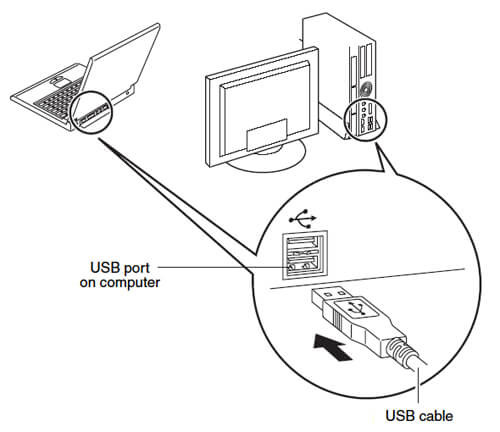
On modern laptops Only the usb port is offered for connection, so it’s probably easiest to connect a printer to a laptop. To do this, connect the printer and laptop with a usb-cord, and then turn on the printer itself. If the laptop is connected to the Internet, he will be able to determine the type of the connected device and will offer to download the necessary components from the network. It turns out thanks to the plug and play technology. In the same way, you can connect the printer to the computer, only it is important to choose the port, and not the hub, because when connected to a hub, the device may not have enough energy for normal operation.
If a disk is offered with the printer, you must use it by installing all the components on offer. This rule works with any type of connection, as it helps to install all the necessary drivers for the printer to work.
If you do not know how to connect the printer to the computer via a parallel or serial interface, the following instruction will help you:
- Through the "Start" go to "Devices and Printers";
- Click "Add Printer";
- Select “Add local printer”;
- Determine the port by clicking "Select a printer port";
- Make sure that the values of the selected ports match;
- On the printer driver page, select your model and install the driver in the appropriate folder.
If you are wondering how to install a printer without a disk, it is important to download drivers for your model from the Internet or use a direct connection for automatic recognition.
Installation wireless printer produced the same way as any other device of this type. Perform the following steps:
- Through the "Start" and "Control Panel" select "Hardware and Sound";
- Make sure the printer is searchable and the corresponding button is on;
- Select "Add Device";
- Sometimes for correct operation you need to transfer the device to WPS recognition mode.
Thus, you can connect any printers for printing, and you can check the success of the connection by printing a test page.
The main feature of printers is that their automatic recognition is quite difficult, since they are external devices. Nevertheless, the connection procedure should not cause serious difficulties even for a novice user who has decided to figure out how to connect the printer to the computer.
We connect the printer, we install drivers
To connect the printer to the computer, you need to perform only two operations:
- Turn on the printer in the power supply and connect to the computer;
- Install the necessary drivers.
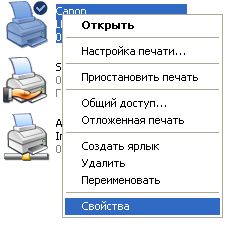
With the inclusion of the network, I think everything is clear. TO USB port computer, the printer is connected in a disconnected state, through a special cable that must be included with the product. If there is no cable, then you need to purchase it. After turning on the connected printer, the computer should detect it and a message should appear on the bottom right with the words: “New hardware detected” or something like that. The name of the equipment will be written below. Next, the installation wizard should open the new equipment. Insert into drive installation disk with the drivers (comes with the product), click "Next" and follow the instructions of the installation wizard. Very often, after installation, you need to restart the computer. After performing all the operations, go to the "Start" menu, select "Devices and Printers" and check whether our printer is installed or not. To check the print, right-click on the printer name, select "Properties" in the drop-down list, then select the "Test Print" function in a new window.
By the way, you can solve the problem of how to connect the printer to a computer in other ways.
Software and printer drivers can be installed directly from the supplied disk. We insert the disc into the drive, after its autostart, a menu opens, from which, by clicking on the corresponding caption or button, we start the installation of programs and drivers.
If there is no software disk, then you can download drivers corresponding to the version of Windows installed on your computer from the official website of the printer manufacturer. It’s easy to get to such a site, just type in the browser search bar the English name of the hardware manufacturer, and then press "Enter" on the keyboard. Drivers are downloaded as self-extracting archives, the installation starts automatically. No installation difficulties should arise.
We connect the printer to two computers
Sometimes it is necessary to connect the printer to two computers. In this case, you can consider several options.
First option
Can create common network from computers and printer. To do this, on both computers you need to install and configure network cards, connect computers with a patch cord, set the name of the workgroup. Then, on the host computer, allow printer sharing in the "Printers and Faxes" properties, and on the secondary, in the "Install printer" menu, click "Next", select "Network printer", then in the "Browse for printers" select the desired printer and path to distribution kit with drivers.
Second option
Another way to connect the printer to two computers is to use an external print server. Manufacturers produce print servers of various options. Starting from simple products, which represent a box with a connector for connecting a network cable on one side and a connector for a USB cable or a parallel port, on the other. And ending with sophisticated, modern devices, which is a network hub or wireless access point.
How to connect the printer to the computer
There are only two ways to connect a printer to a computer:
- Local.
This method involves connecting the printer to a computer via Wi-Fi or USB. At the same time, the connection is made using the driver supplied with the purchased printer. Also, the driver can be downloaded from the Internet. As a rule, connecting in this way eliminates any problems with the connected printer, in contrast to the second method. - Network
With this method, the printer can be connected to the computer locally and thanks to the provided general access it is also possible to connect to other computers local network or print server this printer. It’s very simple to make a network printer: just connect it to a computer or a print server using Wi-Fi, USB or Lan and open access to all users of this network.
Often there are situations when the number of printers in the office or home is less than the computers on this network, and when printing documents, additional configuration of the printer is necessary so that it can print over the network.
An example of the most common situation. There is a printer to which one computer is connected, and printing is required from another over the network. In such cases, there are several options for connecting the printer to the second computer. The simplest ones are as follows:
Connect a network printer using a computer
Sometimes, in order to work with the printer over the network at the same time two computers could be required, additional settings are necessary (if in the process of setting up the network printer an error “No access” occurs.
Method number 1
Initially, you should find out the name of the computer (to which the printer is connected). To do this, you need to right-click on the “My Computer” icon. In this menu, select the "Properties" and in it - the tab called "Computer Name". In Windows7, this tab will be the last one in the list of the “Properties” mark. This menu can also be accessed in another way - by going to the control panel menu, find the System icon (System Properties).
Having learned the name of the computer we need, we can proceed to another computer. In it, click on the button "Run", or you can simply open one of the folders. Next, in the address bar (folder address) that appears at the top, you must enter \\\\ computer name. Example: if the computer name is “printserver”, it means that “\\\\ printserver” should be entered in the string. After these manipulations, ENTER is pressed. Thus, we get to the remote computer and we can see all the available network resources. This includes a printer that can be installed by simply clicking on it.
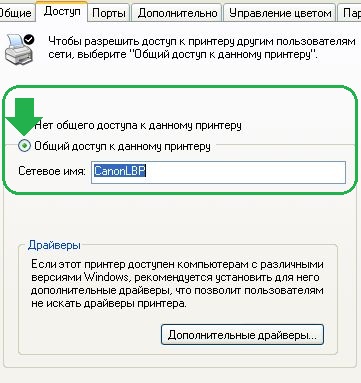
If the printer does not appear in the list of available network resources, then it must be opened for access. To do this, go to the computer to which the printer is connected. In it, we go to the “START”, then selecting the “Printers” tab and in this window that appears it is necessary to click the right mouse button on the printer that we need. In this menu window, select "Properties", then find the tab "Access". In this tab, you need to put a tick in front of the “Open sharing” mark. Thus, this printer will appear in the list of network resources.
Method number 2
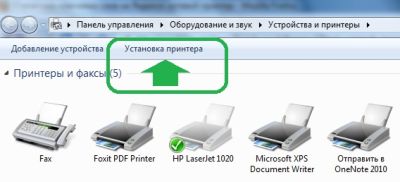
You need to go to the control panel and select the folder "devices and printers" in the proposed menu. Then click "Add a printer" (or in other versions of "Add Printer"). In the wizard for installing new devices that appears, click the “Next” button, then select “Connect to printer” or “Browse the printers on the network”, confirming the selection by clicking the “Next” button. The new window that appears will offer a list of devices on the network where you will need to find the printer you need and confirm its selection by clicking the "Next" button. The process will be completed operating system without your further participation.
Note
There are cases (if computers on a network with different windows versions), when installing you may need a driver for the printer. Such a driver can be taken from the disk that came bundled in the printer, or downloaded from the Internet - from the manufacturer's website of this printer.
If the printer is connected to the network directly using its own network interface or through a print server, then such a device is easier to connect using the installation wizard, which usually comes with the printer (MFP) in the form of a compact disk.
If there is no possibility to use such a disk, then it is worth using another method. To do this, go to the "Printer Setup Wizard" by following the instructions in Method 2. Here you should select the mark “Local printer” and then - “Create a new port”. In this menu, select "Standard TCP / IP port". The “Add Printer Wizard” will appear on the screen. In the "Printer Name / IP Address" field, you must enter the IP address of the printer, which is specified in the instructions and settings of the printer itself. Having correctly completed all the steps, the process can be completed by a few clicks of the “Next” button in the windows that appear.
Some printers need additional settings, which include TCP / IP port settings.
The printer has long become the same constant companion of the computer as a mouse, keyboard or speakers. Therefore so it is important to know how to connect the printer to the computer: because if you do not have your own device for printing, then it's time to fix this mistake.
Device connection
Conventionally, the process of connecting the printer can be divided into three stages:
- Connection to power supply.
- Connection with the system unit (laptop).
- Installation software (sometimes not required).
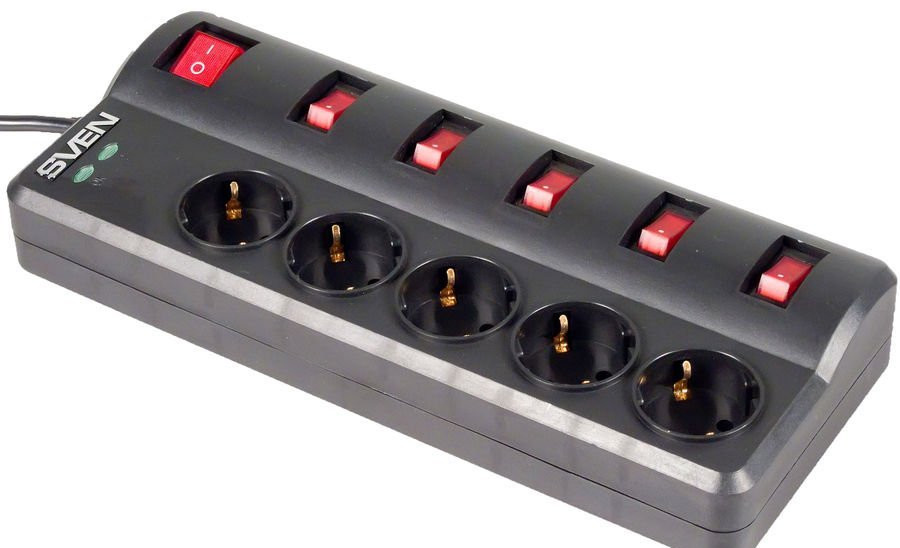
Install printing equipment on the table. Connect the printer to a nearby outlet with a power cable. The equipment can not be connected to the uninterruptible power supply: the printer consumes a lot of energy and still can not work. Therefore, it is better to avoid unnecessary load on the BBP in advance and connect the printing device to a standard outlet or a surge protector.
Next you need to connect the printing equipment to system block or a laptop. Previously, an LPT-port was used for this purpose, but in recent years all printer manufacturers have switched to a USB interface.
If you have an old printer model with LPT-connector, then you can use a special adapter to connect. However, this method is unreliable, since not all models work, so it’s better to purchase modern equipment.
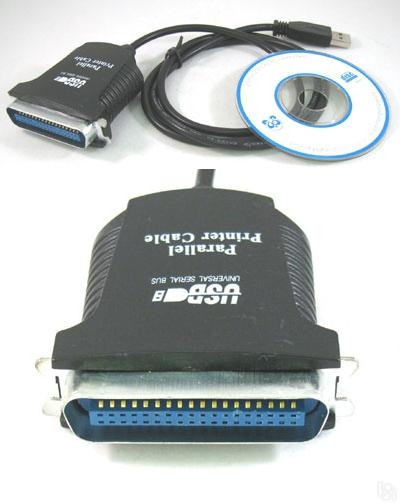
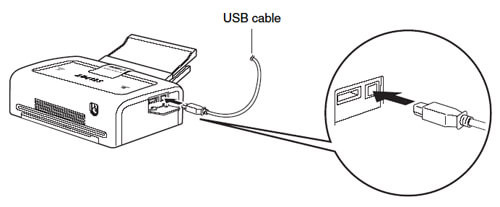
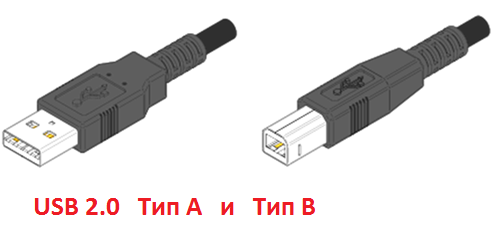
Pay attention to the USB cable (it should be included). At one end it has a USB "Type A" (the usual oblong connector), and on the other - a USB "Type B" (almost square connector). "Type A" is connected to the system unit, and "Type B" is installed in the port on the printer. It is impossible to get confused, since you physically will not be able to insert the plugs into the wrong connector.
Equipment setup
How to connect the printer to the computer, we figured out, it's time to move on to the initial setup of the equipment. Included with the printer are not only cables, but also disks for installing drivers. Usually, when connecting a device, the system suggests inserting and installing software - all you have to do is follow the wizard’s recommendations.
You can also start installing the drivers in manual mode: just open the CD with the printer software and run the setup .exe file. By the way, usually on one carrier there are drivers for several models - be sure to choose your printer.
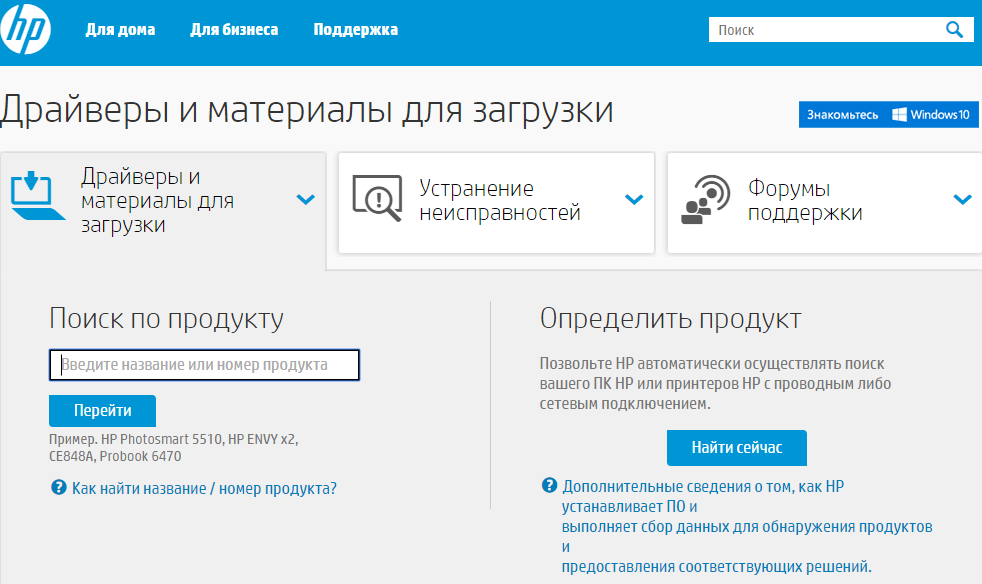
Installing drivers for the printer does not cause questions, as well as, if there is a carrier with software, but how to connect the printer to a computer without a disk? Nothing complicated - you just need to download the necessary components from the site of the equipment manufacturer. For example, you have an HP printer:
- Go to the manufacturer’s website and find the “Drivers” section on it.
- Use the product search to find the driver.
- Download the appropriate software version to your computer and install it in the system.
Similarly, you can solve the problem with the lack of disk for all printers, regardless of manufacturer, so you should not have any problems connecting and setting up the printer to a computer or laptop.
Printing documents at home is a great opportunity. Someone uses the printer constantly for work or school, someone only needs it from time to time to print letters, receipts or air tickets.
If you have already purchased a printing device and are wondering how to connect it to a computer, then in this article we will explain how to do it. Connection and installation is reduced to three points: you need to connect the device to the network, connect it to a computer or laptop and install the driver.
Connecting the printer to the power supply and computer
So, first of all, connect your printer to the power supply.
Next you need a USB cable. It usually comes bundled. If, for some reason, you do not have it, purchase it at any electronics store. The USB cable at two ends has different types of connectors. Connect the end with the USB Type A connector to the computer, and USB Type B to the printer.
Driver installation
After connecting, you need to install the driver.
Operating theaters windows systems 7 and Windows 8 support most modern printing devices, so the driver can be installed automatically with an Internet connection.
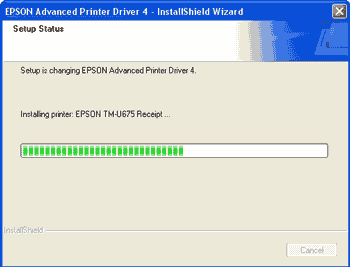
If this does not happen, you will need a disk with a driver that should be included. Insert it into the drive and the installer will start automatically. Then just follow the prompts.
If the installation wizard did not start automatically, go to My Computer, select the driver disk and start the installation manually by double-clicking on the Setup file.
If there is no driver disc, first of all find out the model of your device. This can be viewed on the device itself. Then enter the device name in any search engine, go to the manufacturer's official website and go to the driver section. After you download the driver, open the downloaded file and follow the prompts of the installation wizard.
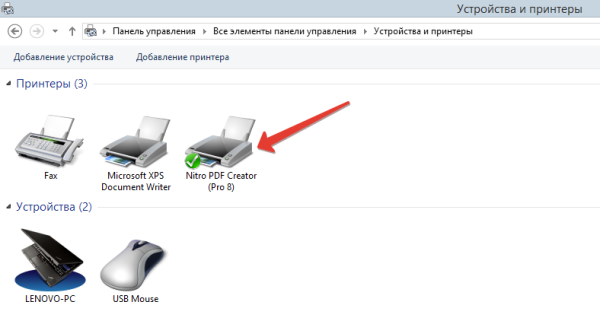
To make sure that the system has seen the printer go to “Control Panel”\u003e “Devices and Printers”.
Network printer connection
If you have several computers or laptops in your home or office, you can set up printing documents over the network. A prerequisite for this is the presence of a “Homegroup”, that is, computers must be connected to a local network.
If the device is connected to the host computer via a USB cable, and access from other computers via the network, the printer is called “Shared”.
Setting up a shared printer
Installation completed. You can start printing documents.