How to connect a network folder in Windows? How to connect a network folder
Search each time the folders in the connected local network computers are not very convenient, it is much easier to use the directories connected as a "Network Drive". It is enough to do this procedure once for each more or less frequently used folder on the local network.
Sponsored by placing P & G articles on "How to connect a network folder" How to remove the winsxs folder How to see hidden files on a flash drive How to find hidden folders
Instruction
Right-click the “My Computer” shortcut on the desktop and select “Map Network Drive” in the pop-up menu that appears. Exactly the same item is in the context menu of the label "Network Neighborhood" - you can use it. If these shortcuts are not on your desktop, then open the menu on the "Start" button, find the lines with the same inscriptions in it and right-click them. And if for some reason they don’t even appear there, then press the key combination WIN + E to launch Explorer, open the “Service” section in its menu and click “Map Network Drive” there.
Select a letter for the folder to be connected as a network drive from the “Disk” drop-down list in the window that opens.
Click the Browse button, find the network folder you want to connect and click the Open button. You can enter the address from the keyboard if you know the name of the computer and the path to the desired directory.
Check the box “Restore upon login” if you intend to use the network folder permanently. In this case, each time the computer boots, the operating system will include the folder.
Click "Finish".
You can connect the network folder in a different order. To do this, first open the Network Neighborhood component - this can be done by double clicking the corresponding tab on the desktop, using the icons in Windows Explorer, or selecting the Network Neighborhood in the menu on the Start button. No matter how you do it, the OS will open the network environment in Explorer.
Go to the folder and right-click it - in the context menu there will be the same item “Map Network Drive”. Select this item and the component window described above will open. The “Folder” field in it will be inactive, as the system will determine the address of the folder you clicked. It remains to do the operations described in the fourth and fifth steps.
How simpleOther related news:
A network drive is a virtual logical drive that is created by a user on his system to simplify the use of a shared folder located on another computer on the local network. This is the main purpose, but as a network drive you can connect, for example, connected to
Do you often access a folder located on another computer connected to a local area network? In order not to pass the entire search path of the desired folder each time, you can connect it as a network drive. Consider how this can be done using Microsoft Windows. P & G Placement Sponsor Related Articles
Network folders are created in the Windows operating system to facilitate resource sharing on the local network. If the folder becomes unnecessary, it can be deleted, however, the rules set by the OS security policy will apply. Therefore, under the deletion for network users
To simplify access to files, folders, and drives located on other computers on the local network, they can be given names and letters and can be assigned the status of a “network drive”. As a result, such network resources will differ little from your local drives in Windows Explorer. However, when changing
There are hidden folders in Windows operating systems. All created folders on the desktop are visible by default. Often there is a situation when you need to protect personal information and hide a folder on your desktop. To do this, Windows has the option to turn off folder visibility.
Windows XP operating system allows you to organize the general access of network users to folders and drives stored on a separate computer. In this case, access is carried out using the system interface or through command line. There are several ways to create and delete network
In the Windows operating system, the Network Neighborhood window contains shortcuts for shared printers, computers, and other network resources. You can open this window different ways. Sponsored by placing P & G articles on "How to enter the network environment" How to restore the label "My Computer" How to remove
I have an internet center with a connected USB drive. How can I configure it so that it is automatically connected as a regular logical drive in My Computer or Explorer? So that you do not have to type the name of the Internet center or its IP address each time, and you can work in the usual way.
1. First you need to make the initial setup of connecting the USB drive to the Keenetic Internet Center according to the instructions in the article (i.e., you need to allow access to the plug-in drive)
2. In order for the network drive to appear in the menu My computer, you need to use the operating function windows systems - Connect a network drive ...(This article provides an example of a network drive connection in Windows 10).
Run Conductor. Right-click on the icon. This computer and select the context menu item Connect a network drive.
3. In the window that opens Connect a network drive You will need to specify the drive letter for the connection and the full path to the network folder.
To get the full path to the network folder, you need to go to it through Explorer and copy the path from the address string (in our example, 192.168.1.1 is the IP address of the Internet center by default).
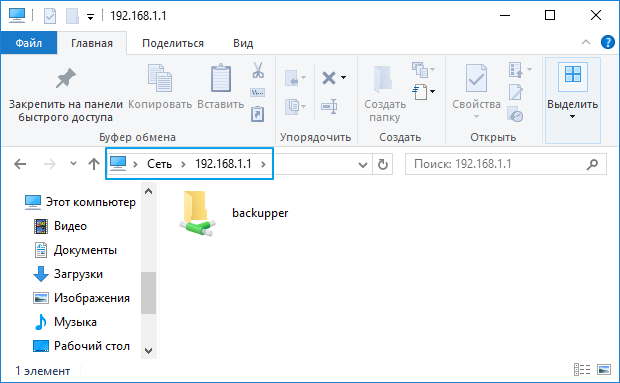

This path must be inserted in the window Connect a network drive in field Folder.
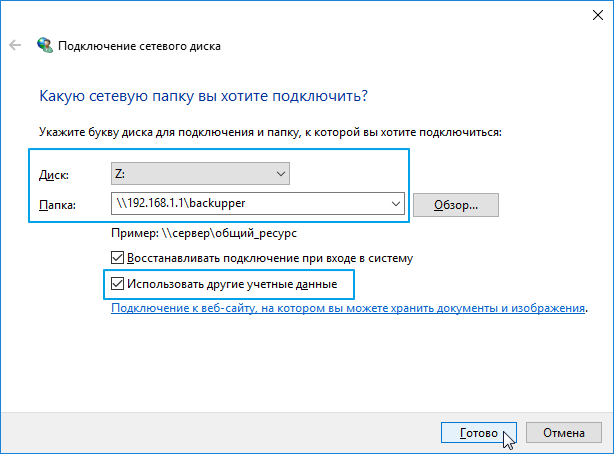
Important! Check the box Use other credentialsotherwise, the system will try to connect to the network drive only with the current account used when logging into Windows.
Check the box Recover upon login, if you want to automatically connect the specified network drive, each time you log into operating system (this will be possible only if the USB drive is permanently connected to the Internet center).
4. After entering data and pressing a button Is done the system will ask for a username and password to access the Internet center disk. This can be any Internet center account with authorized service access. cifs and the specified password. Information on setting access rights to a USB drive connected to the Keenetic Internet Center can be found in the article.
Attention! Windows does not allow you to connect network drives to accounts without a password. You can connect either without authorization, or using an account with a login and password.
In our example, we use the system account admin with password set.
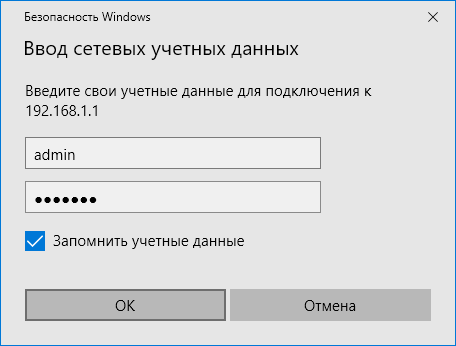
Check the box Remember credentialsso that you do not enter your username and password each time.
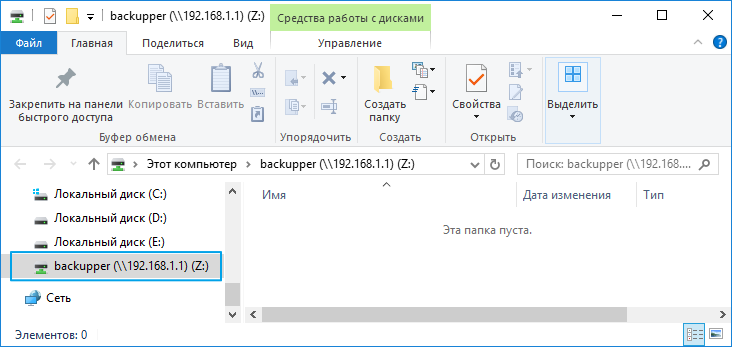
5. After pressing a button OK The network drive is added to Windows and appears in the list of drives.
If you set up a local network at home (if Wi-Fi is present, it is present by default) and created shared directories, then you can go to the next level - setting up network drives. Let's take a look at how to mount a network drive so you can increase storage space or create a shared folder accessible to users from other computers on the network.
Preliminary preparation of the system
Before creating a network drive, you need to check the sharing settings.
You must have a network card connected and a local network configured on your computer.
Open the "Network Control Center" and click on the "Change sharing settings" link in the menu on the left.
Enable discovery and sharing, as shown in the screenshot. Click the "Save Changes" button. 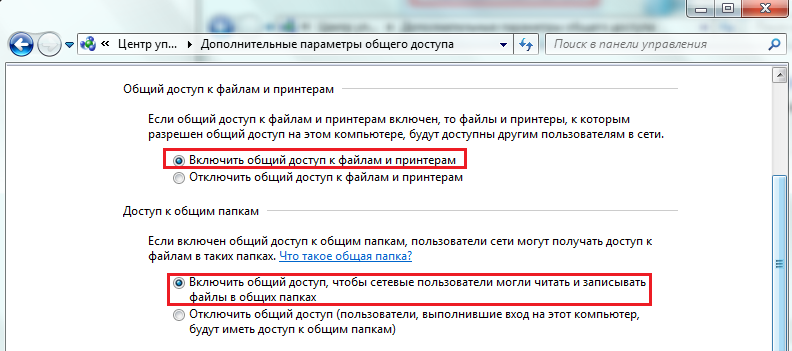
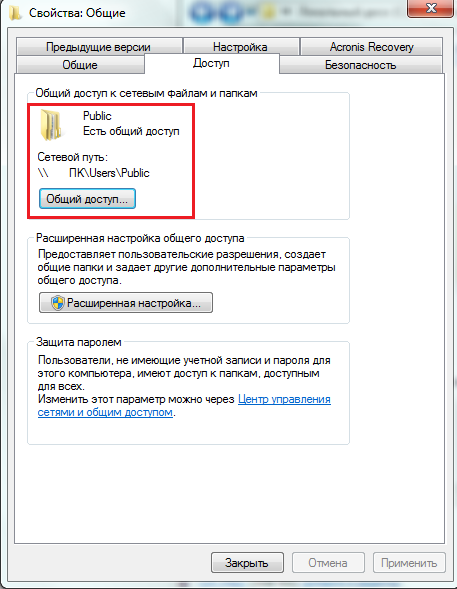
In addition, you must set up a directory by making a public directory of it. For this:
After saving all changes, the folder will become public. Now you can proceed to create a network drive.
Connection
Attention! To connect a network drive, you must have administrator rights.
For all windows versions This procedure is almost identical, so the instructions below are universal. Open “My Computer” and find the “Connect” button in the top menu. ![]() A window will appear on the screen in which you need to specify the letter of the disk being created and the directory to which you want to connect.
A window will appear on the screen in which you need to specify the letter of the disk being created and the directory to which you want to connect.
Attention! Try to choose letters from the end of the Latin alphabet to avoid possible conflicts with physical media.
The folder address must be rewritten from its properties on the computer where it is located. 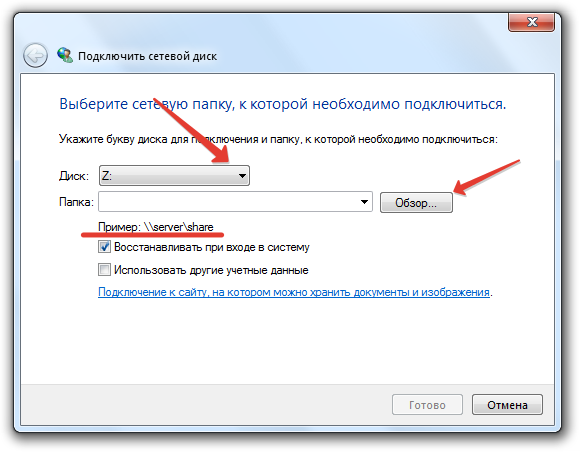 The address should have the following form: \\\\ computer name \\ path \\ name. You can also click the Browse button and select the desired directory on another computer manually.
At the same time, the directory should be “shared”, that is, it should be pre-prepared for work in the public domain.
You may need to enter a password from the local network (home group). To view it, go to the “Control Panel”, go to the “Network and Internet” tab, and then select the “Home group” section. Click on the link “Show or print password” below. 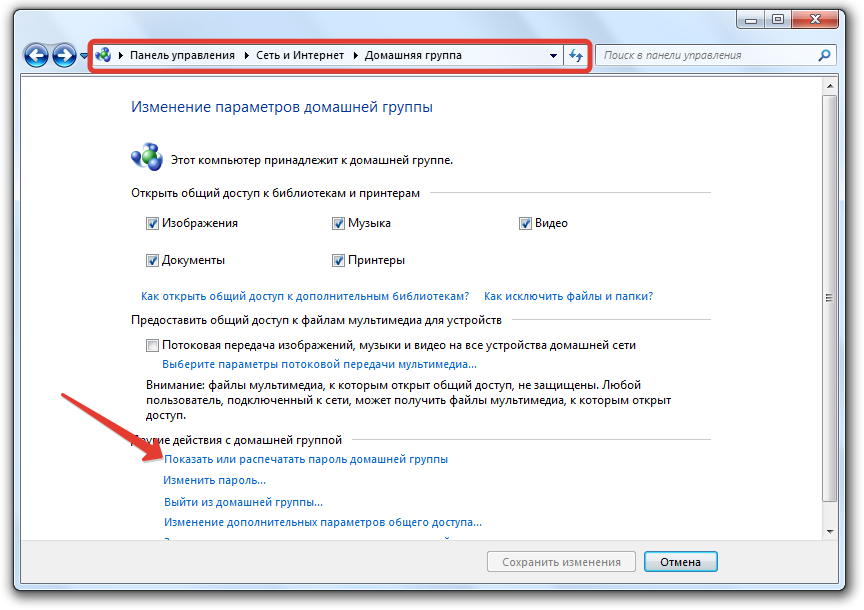 A window will appear on the screen in which your home group access code will be listed.
 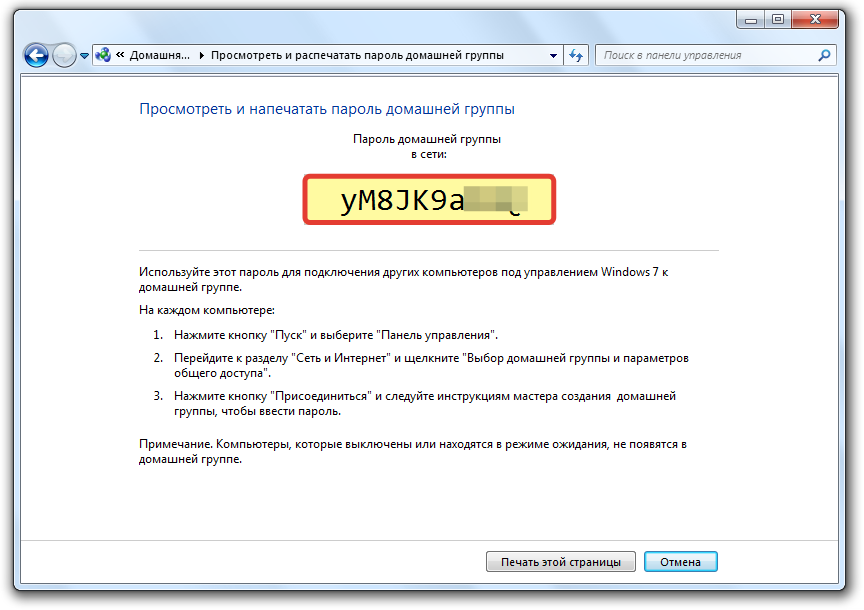 Write it in a special field and click "Finish". After that, the network drive you created should appear in “My Computer”, which will carry the letter that you assigned to it. Now you can use a shared folder on the network, without bothering yourself with questions how to connect a laptop to a laptop or PC to a PC.