The name of the file copy of the image of Windows 10
A backup or backup of a system is a Windows 10 image that contains a complete installation. operating system with the settings of applications, services, games and personal files. The “System Image Backup” tool was added back in Windows 8.1. The disadvantage of backing up the system is that it is impossible to restore a file separately.
Method number 1. Using the standard utility
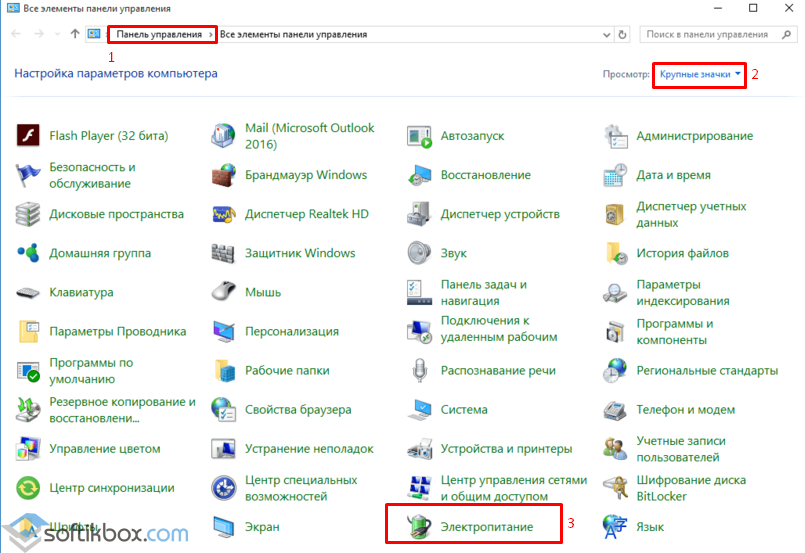
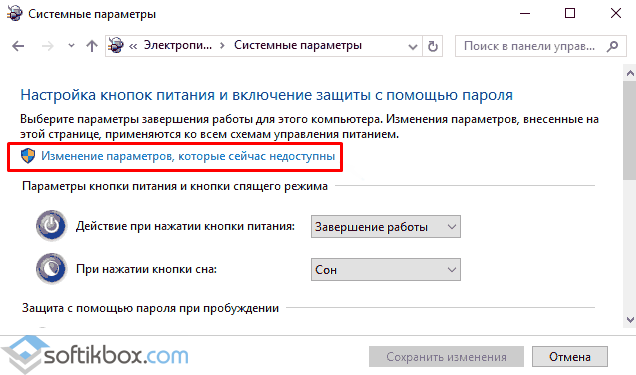
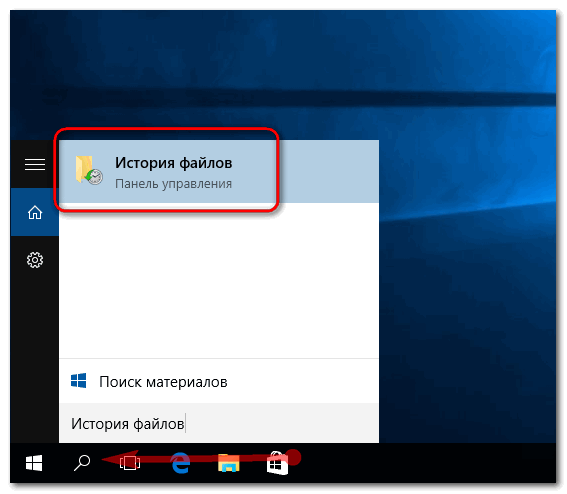
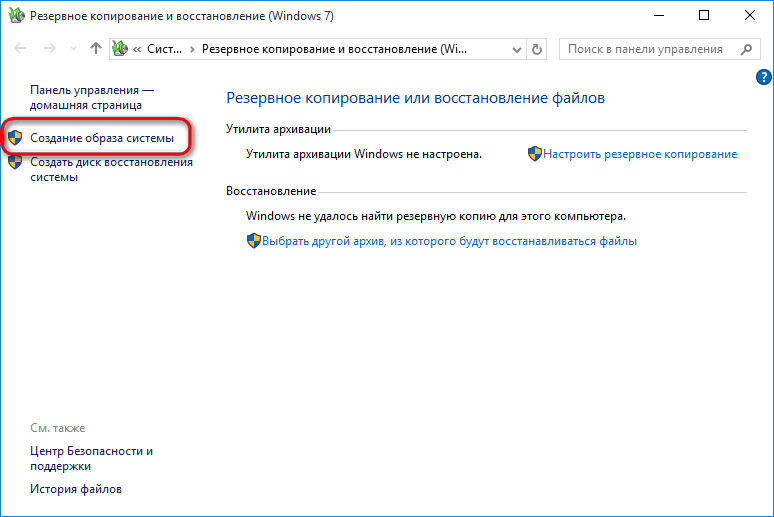
You can back up a disk with Windows 10 using the built-in utility "Backup and Restore", which is located in the "Control Panel".
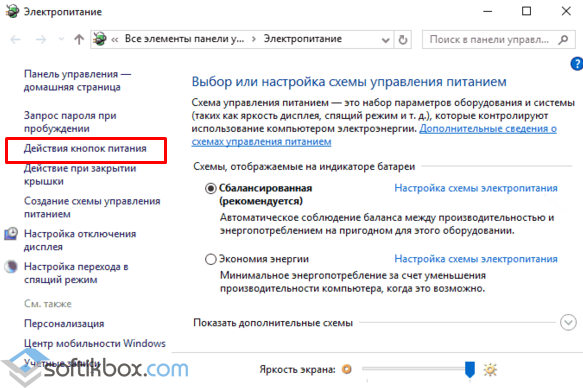
Having opened this element, in the left menu choose “Create system image”.
![]()
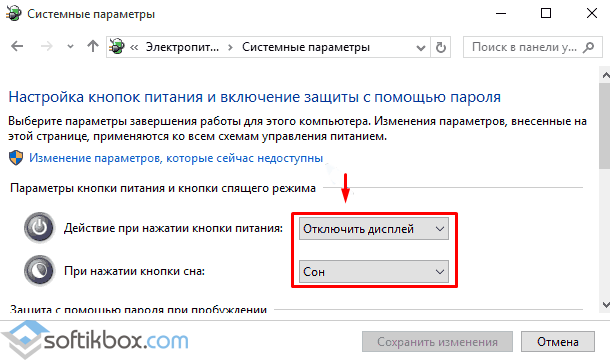
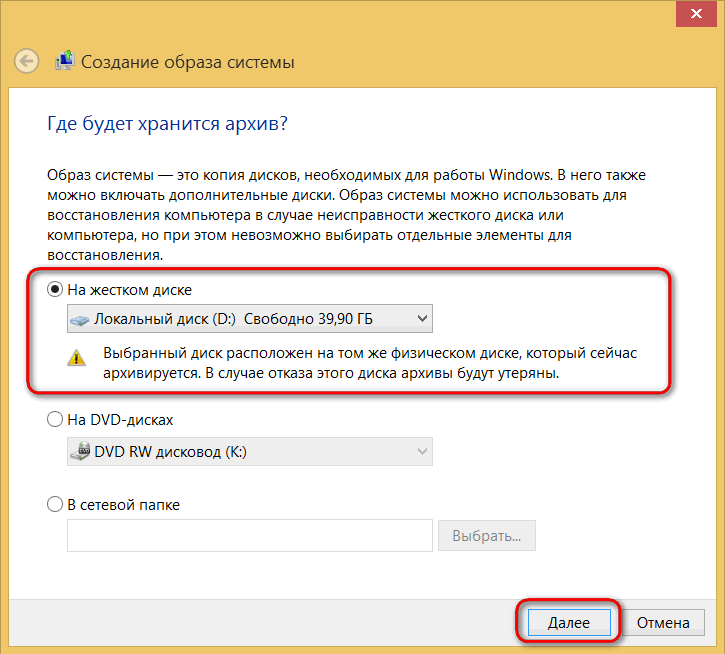
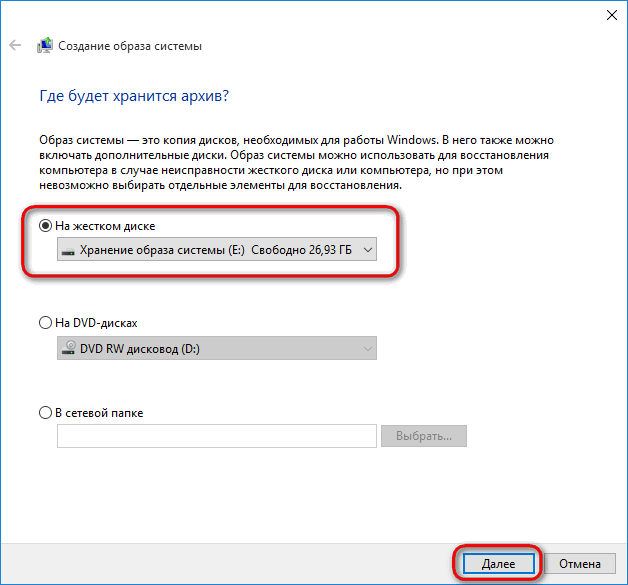
In the next window you should choose the storage location for the backup copy of Windows 10. For this purpose, you can use a USB flash drive, a separate SSD or HDD drive, network folder. In the utility we set the mark “Hard disk”, select the carrier from the list and click “Next”.
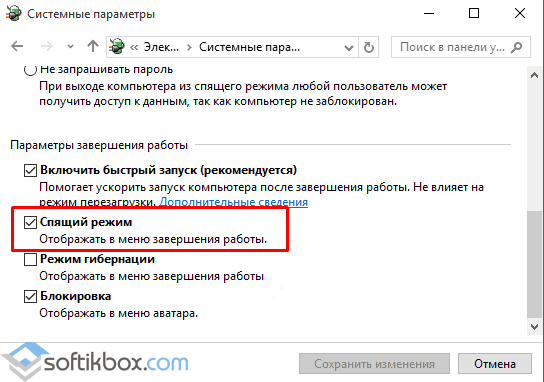
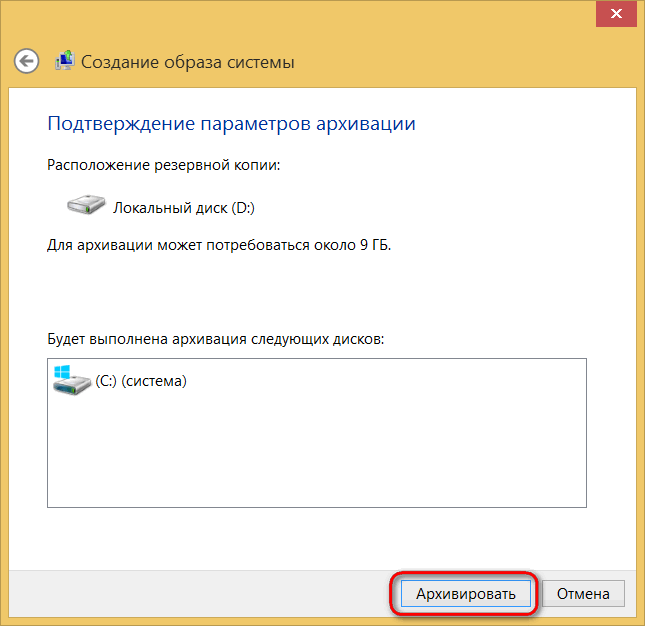
By default, the C drive and the “System Reserved” section will be added for archiving. You can also add a disk D. Click "Backup".

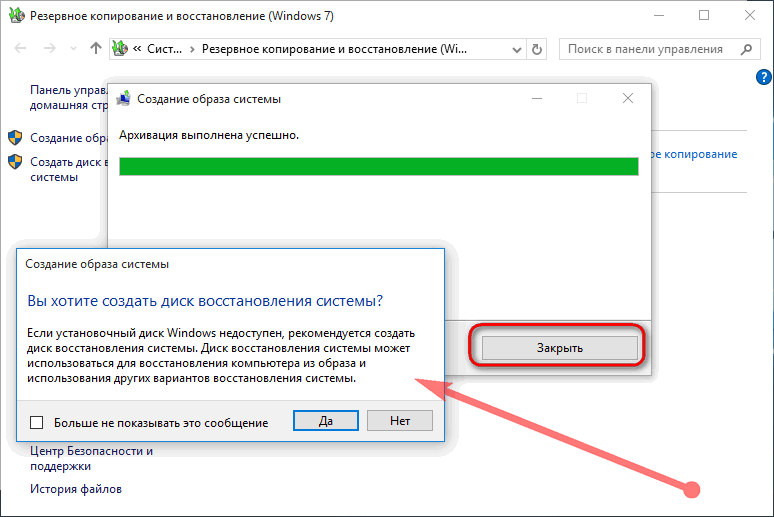
After the backup is complete, a notification will appear prompting you to make a backup or system recovery disk. Click "Yes."
After a few minutes (from 20 minutes), a backup of the system will be created. Disconnect the USB flash drive and use it as needed.
Method number 2. Creating a system recovery disk using the DISM utility
To create a Windows 10 OS recovery image using the built-in utility DISM.exe, do the following:
- Click the right mouse button on the "Start" menu and select "Command line (Administrator)".
- At the command prompt, enter in sequence:
- diskpart;
- list volume (remember the disk with Windows 10);
- exit;
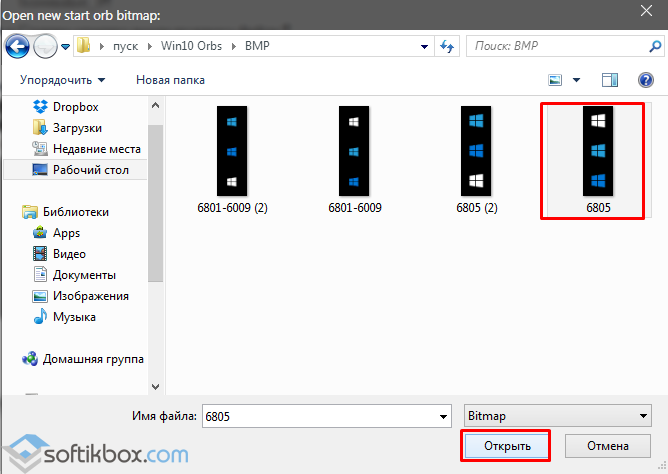
- Dism / Capture-Image /ImageFile:D:\\ my-softikbox.wim / CaptureDir: C: \\ / Name: "Windows"
my-softikbox.wim: is the name of the copy of the disk image with Windows 10 (you can set your own parameters, you must leave the .wim extension only).
D: \\ is the place to save the image.
C: \\ - a partition with an installed partition with an installed operating system.
The image will be saved on disk D with the name my-softikbox.wim.
Method number 3. Create a disk backup using the LiveCD Aomei Backupper Standard
Make backup Windows 10 using this program is quite simple. You need to download it on the website and run it on your PC. Next, do the following:
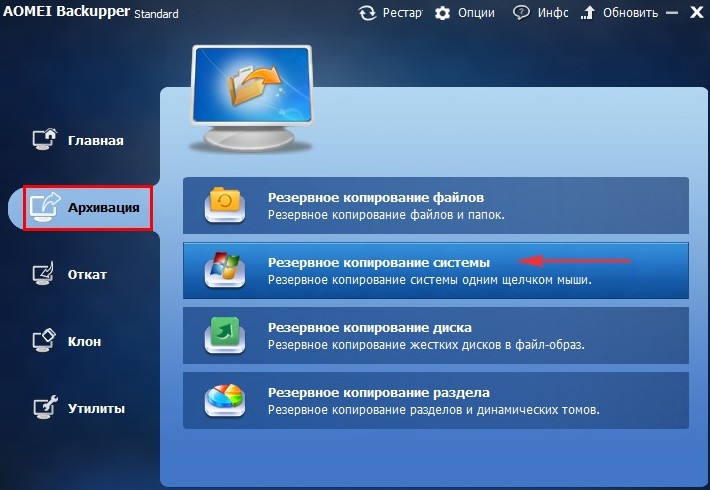
- Select the section "Backup" and the option "System Backup".
- Enter the name of the backup copy of Windows 10. You also need to specify the disk in which you can save the image. After clicking “Start copying”.
- The process of creating an image will start.
How to restore Windows 10 using system backup?
If you need to perform a C drive recovery after a critical error and you previously made a Windows 10 image through the Backup and Restore utility, which is in the Control Panel, do the following:
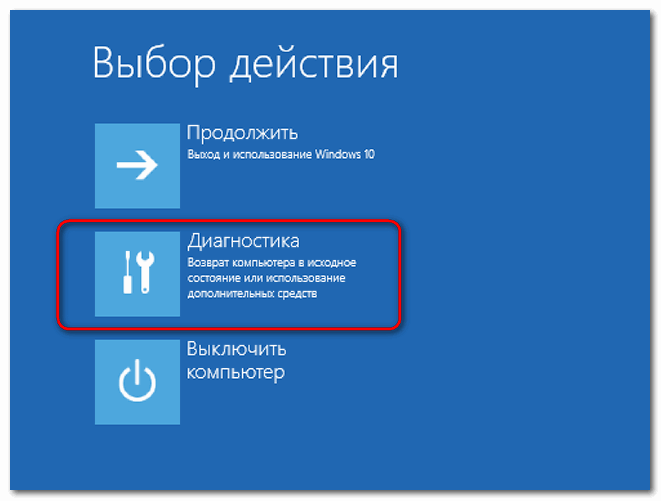
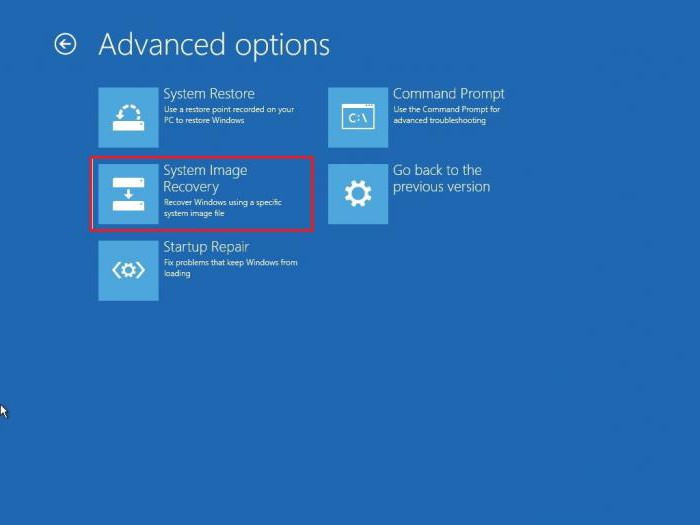
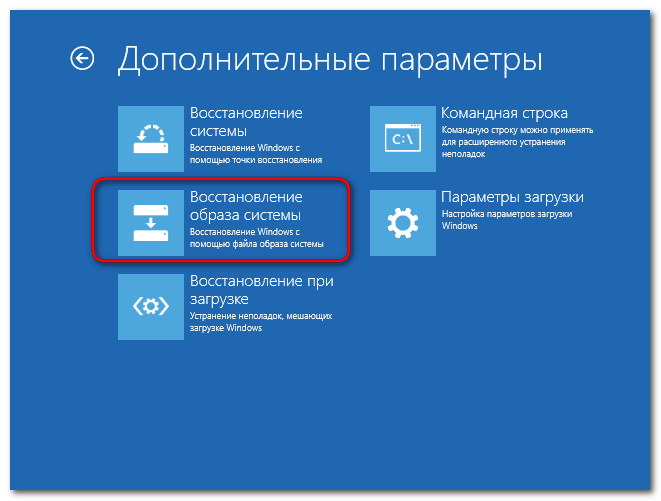
- We press "Start", go to the "Shutdown" section, hold down the "Shift" button and click "Restart". The computer restarts and the “Advanced Settings” menu appears. Select "Restore system image."
- A new window will open. The system will search for the backup file. Therefore, a flash drive, a disk must be connected to a PC. You can also manually specify the storage location of the disk image.
- At the next stage, the system will offer to select sections for formatting.
- Next, start the system recovery from the image.
If you did an image through the utility DISM.exe, you should restore Windows 10 as follows:
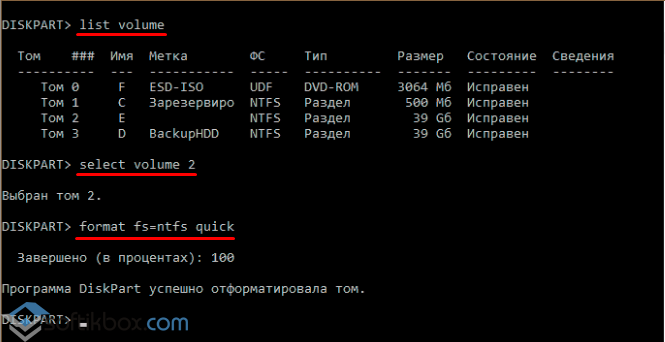
- We enter diskpart in the command line with administrator rights;
- list volume and remember the drive letter C and the section "Reserved by the system";
- select volume 2, where 2 is the system disk number;
- format fs = ntfs quick - command for formatting.
- select volume 1 - where 1 is the number of the “System Reserved” section;
- format fs = FS quick - where FS is the current file system of the partition;
- assign letter = Z (assign the letter Z to the section, it will be required later);
- exit;
- dism / apply-mage /imagefile:D:\\ my-softikbox.wim / index: 1 / ApplyDir: E: \\, where my-softikbox.wim is the backup of the system, D is its storage location and E is the partition to restore , that is, drive C.
- bcdboot E: \\ Windows / s Z :, where E is the system disk with Windows 10, and Z is the “System Reserved” section.
- Diskpart;
- select volume 1 - the section "Reserved by the system";
- remove letter = Z - to remove the letter of the reserved section;
After restarting the PC, Windows 10 will be restored from the image.
If you made a backup of Windows 10 using the Aomei Backupper Standard program, restore it as follows:
- Run the program and go to the "Restore" section. If a disk with a copy is connected to a PC or a copy has been saved to disk D, then the program will automatically find and set the correct path to the backup file. Otherwise, you will have to specify the path yourself.
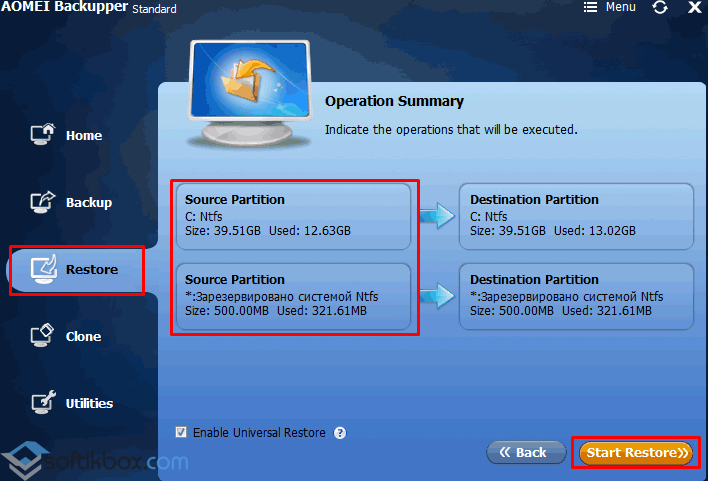
- Click "Start Restore".
Also create a backup image of Windows 10, you can use other programs.
To learn how to back up Windows 10, see the video:
The overwhelming majority of users (perhaps you are also one of them) with disdain relate to the function that allows you to backup Windows 10. By the way, it’s in vain.
Backup copy windows systems 10 quite often can literally help out a very difficult and seemingly intractable situation.
Why do I need a backup
Many people think that the system can "collapse" from anyone: from a neighbor, friend, acquaintance, relative - but not from themselves. As if they are special and are protected by the Great Chinese firewall. But this is not so: an error in the system can occur for everyone, no matter what.
Perhaps this will be a consequence of a hacker attack, or perhaps the user himself deleted or corrupted the files and commands important for the functioning of the system.
The result will still be the same: the operating system will cease to run, and a huge amount of information stored in it will go into oblivion. You can insure yourself from such an outcome only in one way: by creating a backup copy of Windows 10. It will help you to quickly restore all the data stored on the disk.
In this article, you will learn how to make a backup of Windows 10. Also get acquainted with the programs that allow you to back up and restore the operating system immediately.
Moreover, the article will address the topic. mobile version Microsoft OS with instructions for creating a backup copy of Windows Phone 10.

Backup using system tool. First way
The system itself has a function. To activate it, it is enough to follow the instructions below, and then there will be no problems associated with this process.
First, you need to go to the “Control Panel” and find the backup tab there. It will be signed accordingly.
Secondly, in the window that opens, you will need to go to the system image creation section. A tab will appear in front of the user. It is necessary to determine the place where the image of the operating system will be copied in the form in which it is now.
Thirdly, after selecting the place where the system will be recorded, you need to click “Next” and go to the section where you can additionally select files and disks that will be reserved and recorded on the new media along with the system.
Next, click on the backup button and start the backup of Windows 10 itself. The system asks if you want to create a disk from which the OS will be restored. The answer is obvious: yes.
The backup process starts. It lasts an average of 20 minutes: it all depends on the performance of the personal computer.
After completion, it will be possible to continue working on the computer, provided that the medium on which the image of the system was recorded has been removed. By the way, a CD, a flash drive or one of the non-system Windows discs can be used as this carrier.
Backup using DISM. Second way
Now we’ll figure out how to back up Windows 10 using the DISM utility that is built into the operating system. In general, it is difficult to say whether this method of copying is easier than the one described above or not. All people have their own preferences. In any case, to back up from DISM, you need to follow the points below.
The first step is to click on the Start interface icon with the right mouse button. After clicking there should be a list. It is necessary to open command line admin. A text console appears.
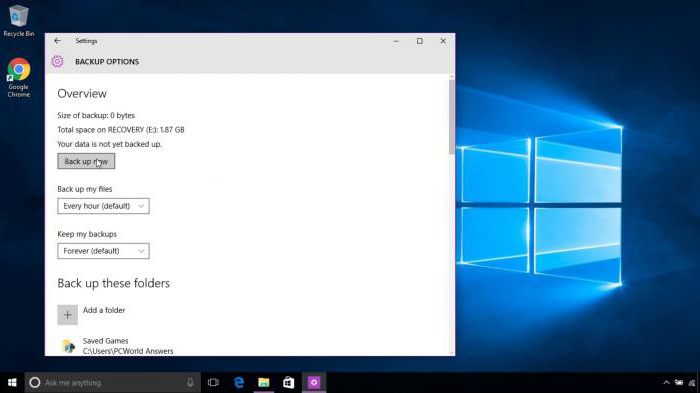
It also provides a system backup feature. And by default, the image is created for all media files, documents and SMS, calls and bookmarks in the system browser or application.
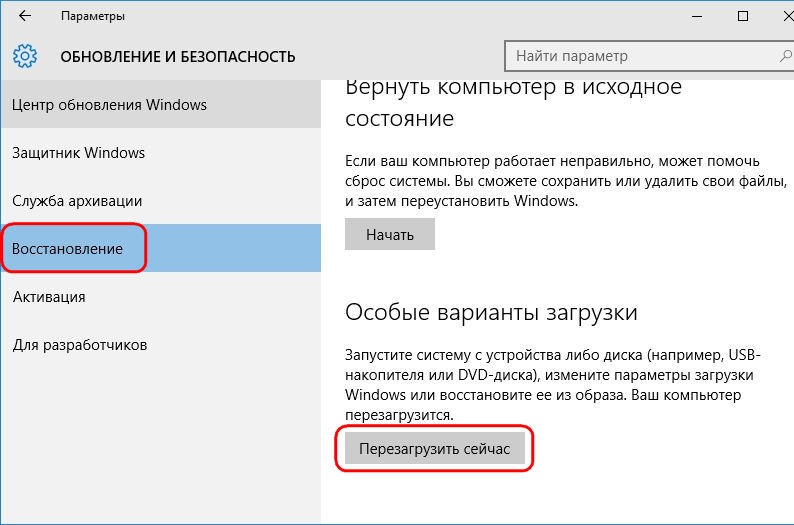
To do this, you need to go to the Settings application in the Update and Security section.
There you need to find the archiving service. It is necessary to put the toggle switch in the "on" position under the line where it is proposed to create a backup copy of the content.
It is interesting that the user can independently choose which parameters will be subject to backup, and which ones will not. This can be done using the "Other options" section.
However, if it was possible to independently determine on the PC where the system image is written, on mobile devices everything is automatically saved into the OneDrive account.
Full system restore
If the backup was done in the first way, then in case of a critical error and incorrect system operation, go to the “Shutdown” section in the “Start” menu, select the reboot item and click on it while holding the Shift button.
When you restart, the advanced settings screen will open, where you need to click on "Restoring a system image". After selecting this item, the system will search for a backup copy and try to install it, so you need to take into account - the media must be inserted into the PC (if we are talking about a flash drive, CD or portable hard drive).
System Restore via DISM
In the event that the Windows image was recorded using DISM, you need to open the administrator command line (as was done above), where you will need to enter:
- diskpart.
- list volume.
- We remember which disk the backup is stored in (under the “Name” column) + disk that will contain the system.
- select volume 5.
- select volume 6.
- format fs-fs quick.
- assign latter = V.
- exit.
- dism / apply-mage / imagefile: * disk where the backup is stored *: \\ * backup name * .wim / index: 1 / ApplyDir: 6: \\.
- bcdboot: 6: \\ windows / s v :.
- diskpart.
- select volume 5.
- remove letter = V.
5 - disk number with the system.
6 - disk number where the system will be installed.
V is the Latin letter to be assigned to the system partition.
Then you will need to restart the PC, and the system will be restored.
System recovery via LiveCD Aomei Backupper Standard
To restore the operating system using this utility, you need to open this program and go to the Restore section, which is located in the sidebar. The program itself will find where the image of the system is stored, and will offer to install it. This is only possible if the media with the image is connected to the PC or that is some kind of disk inside the system.
In any case, the path to the backup can be specified independently.
After all the settings (if any), click on Start Restore, which will be highlighted in orange.
As it turned out, creating an image of the Windows system is a snap. The main thing that needs to be learned is: do not neglect the backup function and, if you need to, it is better to use it.
Who knows what data you will need in the future. It is better to make their image, so as not to lose completely in the future.
All these actions are applicable to the mobile version of the operating system from Microsoft, because now users store a huge amount of important information on smartphones and tablets - mobile devices, which are always at hand. Yes, cloud services in Russia and the CIS are not yet so popular.
We have already talked about the built-in recovery tools that allow you to quickly return Windows 10 to a healthy state in the event of software problems. Consider in detail the backup, which allows you to save settings, programs and files.
Creating a system image
You can create a Windows 10 image using standard tools that were first implemented in Windows Vista. The backup copy of Windows 10 will be a copy of the system with its settings, installed programs and user files that are stored on the system partition (usually drive C).
The image can be saved on another (non-system) hard disk partition, a second connected hard drive, several optical media or network resources. It is preferable to choose a second connected hard drive (if any) or a non-system partition of the hard drive. 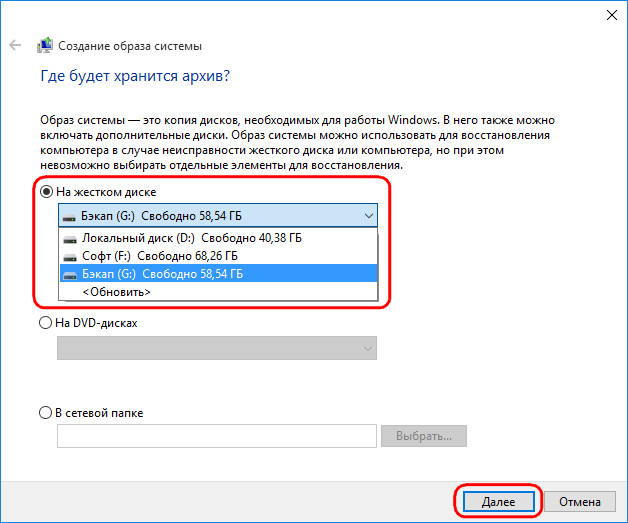
By default, disks containing the boot sector and the Windows 10 system partition will be added to the archive.
You can archive other sections, but the built-in image creation tool for this is not the best way. When restoring, it is likely that archived sections with user files will be erased.
Therefore, leave the standard configuration - section, reserved by systemand volume with windows files. 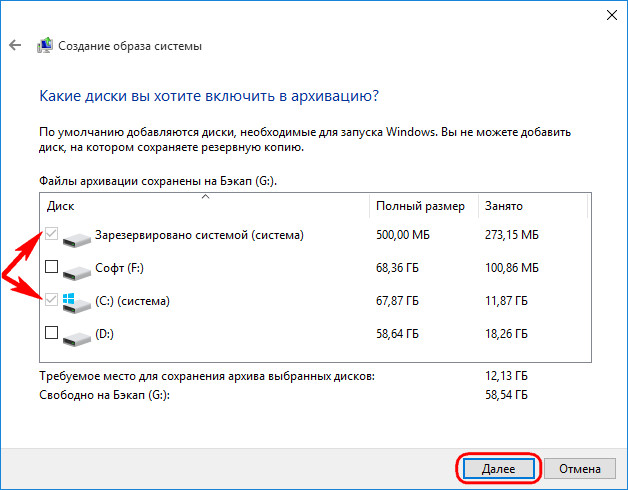
After selecting the composition of the image, click "Archive". When the image is prepared, the system will offer to create a recovery disk, which can be used if Windows 10 stops booting. 
If there is an empty “blank” at hand, use this feature - it is easier to get Windows into a healthy state from the recovery disk than through the F8 key or installation media. Insert optical media into the drive and click Create Disc.
You can create a recovery disk later - more about this we told in the article on how to restore Windows 10.
You don’t need to do anything else: the backup will be stored in the location you specified, until you need to use it to restore Windows.
Restore from backup
The backup is stored on disk, it remains to be restored to return Windows 10 to a healthy state. If the system is unstable, but it loads:
If there is no such button in the Windows settings, or the system stopped running, then use the previously created recovery disk or the installation media with the Windows 10 distribution.
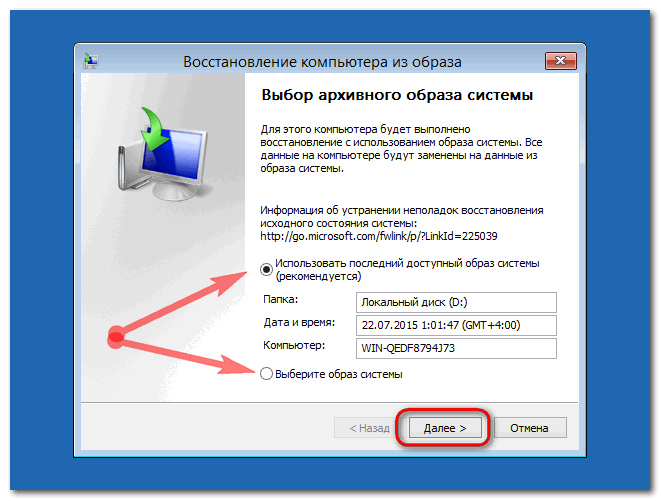
An image recovery wizard will appear on the screen. By default, the last by the creation date of the system cast is selected, but you can manually specify the path to an earlier copy, if available. Click "Next". 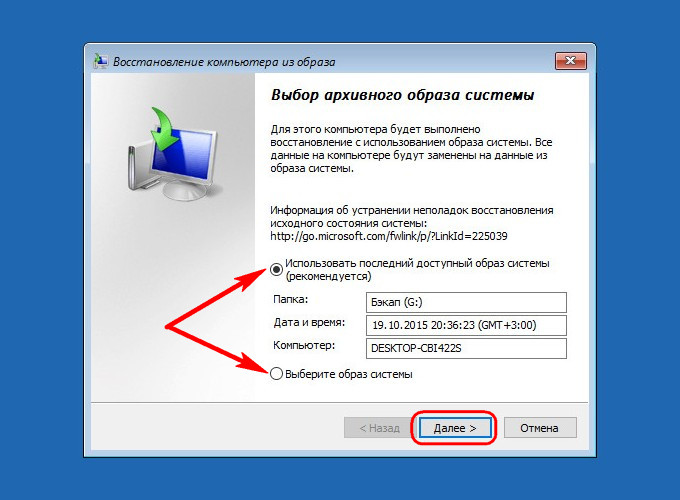
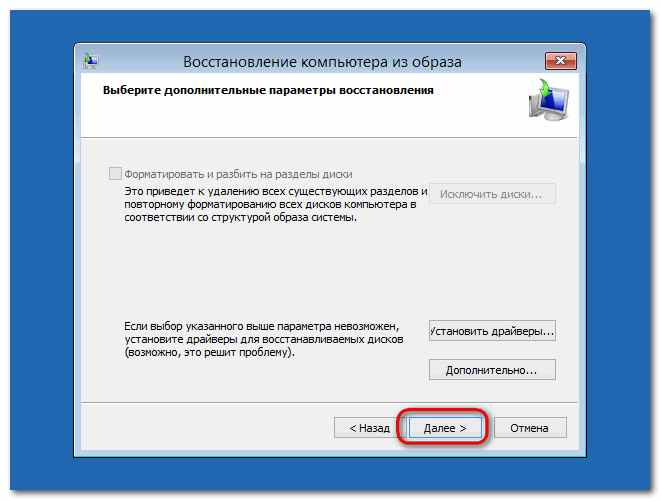
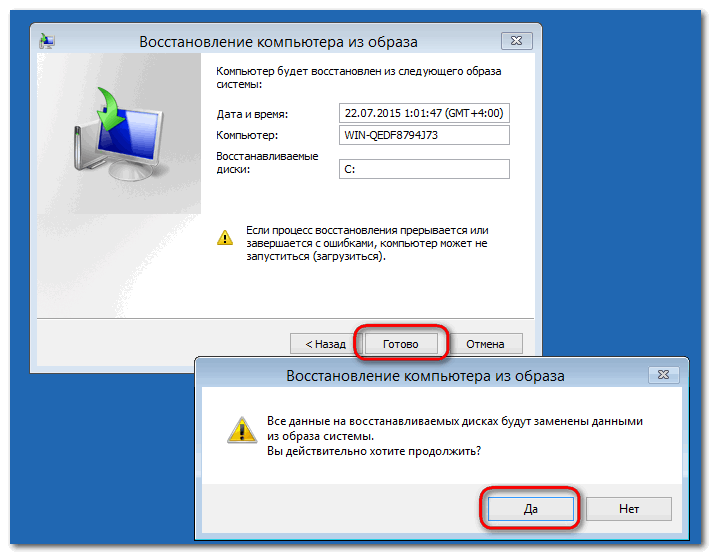
You don’t need to change anything in the second window of the wizard - click “Next”. Check the specified information and click Finish to start the Windows 10 recovery process from the system snapshot created earlier. 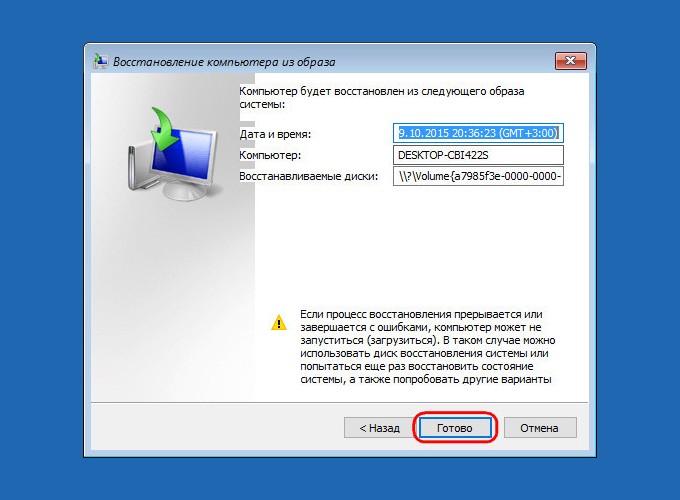
Confirm the replacement of the data and wait until the system recovers from the image. After this process is complete, restart the computer. When you start you will see that Windows 10 is returned to the state in which it was at the time of the system snapshot.
AOMEI Backupper Standard
If the regular backup tool does not suit you, use the free AOMEI Backupper Standard program. This utility offers a simple and effective way to create a copy and then restore the system.
If the system boots, then you can restore it from the created image in the program interface in the “Restore” section. The copy location is determined automatically, but if this does not happen, specify the path manually. Make sure that the recovery is performed in the desired location and click "Start Restore". 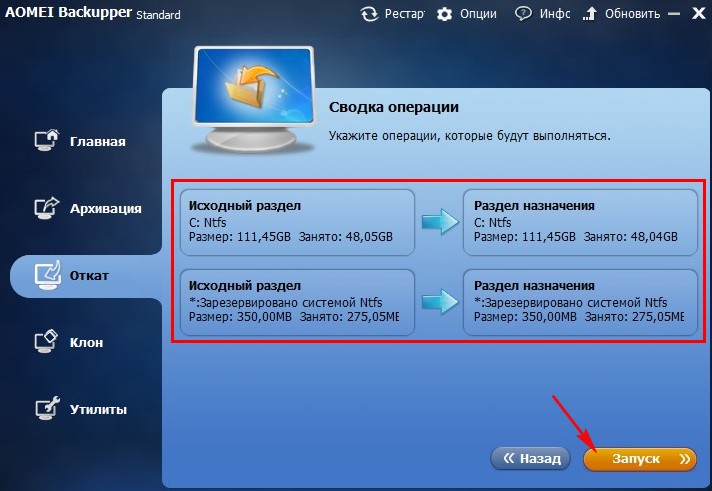
Above was described the ideal option in which you can get into the system. In practice, users resort to recovery from backup only if Windows 10 completely refuses to start. In this case, you will need a bootable USB flash drive, previously created in AOMEI Backupper Standard.
- Connect the USB flash drive to the computer.
- Run the program and go to the "Utilities" tab.
- Select "Create Bootable Media".
After booting from this flash drive, the main program window will open, through which you can start recovery from an image using the above instruction.
There is another free way to create a Windows 10 image — use Macrium Reflect Free. It works on the same principle as AOMEI Backupper, offering to write a backup and create a bootable USB flash drive, which is useful if the system does not start.
There are other options, such as backup tools from Acronis. They provide more features than the standard Windows tool and the programs listed above. In particular, Acronis True Image creates an image of the system, which takes 2 times less space than the image created by Windows. But you need to pay for Acronis products, so this option is unacceptable for most users.
In order to create a backup Windows users often use third-party programs, for example, Acronis True Imageits free equivalent AOMEI Backupper Standard and others. Users use the regular backup functionality of the operating system less often for the banal reason of ignorance.
Although the ability to create a backup image of an installed and configured Windows (with the necessary drivers and programs) without the help of third-party tools provided within the system, starting with the version of Vista.
About the regular backup functionality of Windows
The system image includes all the data needed to run it, and this is the system partition and 350 or 500 MB reserved for the needs of Windows in versions 8.1 and 10, respectively.
If something goes wrong with Windows later on - a virus will penetrate, updates are unsuccessfully installed, third-party software will introduce an unexpected surprise, if the problem that has arisen is not resolved by rolling back Windows to the restore point, the operating system can be recreated from the backup image. And storing a backup copy of the Windows image on removable media or an alternative hard drive will help restore the system to a previously captured state even after the main hard drive.
Backing up the system by regular means, in fact, in no way inferior to the same process with the help of third-party programs. On the contrary, regular functionality has an advantage. So, if Windows stops booting, it can be restored using third-party programs only if they have bootable media. And you can get into the standard recovery environment in several ways: you can boot from a specially recorded recovery disk, you can use the installation for the same purpose windows diskYou can even try to have time to use the F8 key when booting the computer.
But in terms of disk space consumption, the regular backup function is quite voracious. Third-party backup software, as a rule, treats every megabyte of the user with care, compressing the data to a possible limit. Windows, to create your own backup, will require almost as much space as the system actually takes.
Below we consider how to create a backup copy of the Windows image and how to restore it from this image in the future. And we will work with two latest versions operating system - with 8.1 and with new 10 .
Image backup: how to create in Windows 8.1
The ability to create a backup of the Windows image is hidden in the function. This is one of the sections of the control panel, and in Windows 8.1 it is easiest to get there by entering a search query in the regular Metro search field. It appears when you hover the pointer in the upper right corner of the screen.
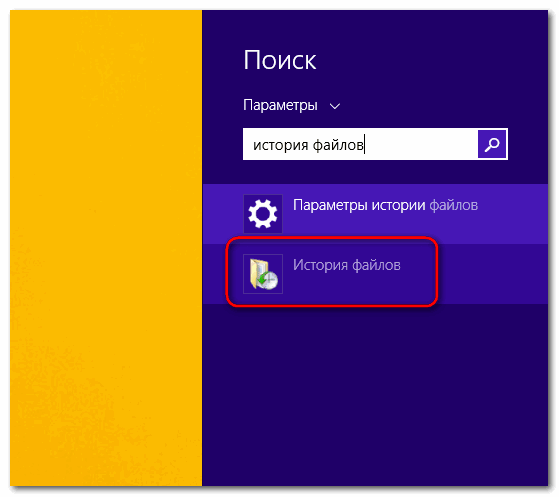
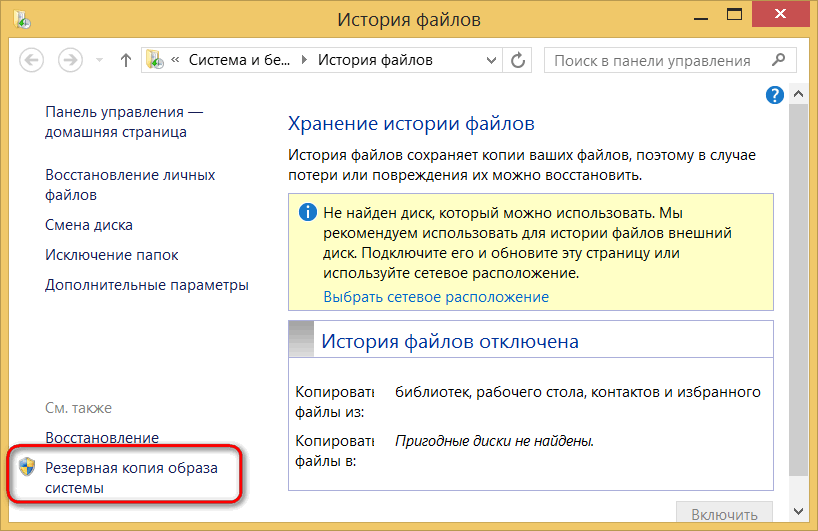
At the very bottom of the window File Stories see the inscription. We press it.
We will get to the window of media selection, where the backup copy of the system will be stored in the future. If a hDD Since the Windows residing on it is working properly, you can safely store a backup on one of its non-system partitions. In our case, the one selected is the disk. D. Otherwise, it will not be superfluous to worry about connecting a second hard disk and select it in this window. If the computer is part of local network, backup can be stored on a network share. As for storing a backup copy of Windows on DVDs, this possibility is taking place, but it cannot be called practical. Having decided on a place of storage, we press.
The button will start the backup creation process.
When the process is complete, we can close the window.
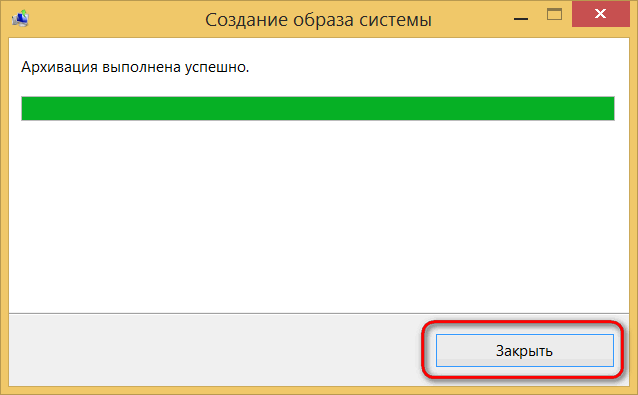
Image backup: how to create in Windows 10
In the new Windows 10, the process of creating a backup image is almost the same as in Windows 8.1. There are some differences, but they are insignificant. We also get to the function with the help of system search, in Windows 10 it is implemented on the taskbar.
In the window File Stories below we press the inscription.

Then further click at the top.
After creating a backup, Windows 10 will additionally offer to create a recovery disk.
Last - A very useful thing if Windows suddenly stops loading. However, if there is an installation disk with Windows 8.1 or 10, the recovery disk, in fact, is not needed. Is that once again reinsured, if at hand is lying empty blank. Naturally, we are talking about the installation CD with the original Windows 8.1 or 10, and not with their pirated editions. In pirated Windows builds, system recovery functionality is often cut out.
Restore Windows 8.1 and 10
So, that ill-fated day came when there were difficulties with Windows that threatened to completely reinstall the system if it were not for the backup copy. Windows 8.1 and 10 are returned to the state captured in the backup in the system recovery environment. If the problem does not affect the ability of the operating system to boot, the easiest way to access the recovery environment is from the Windows interface.
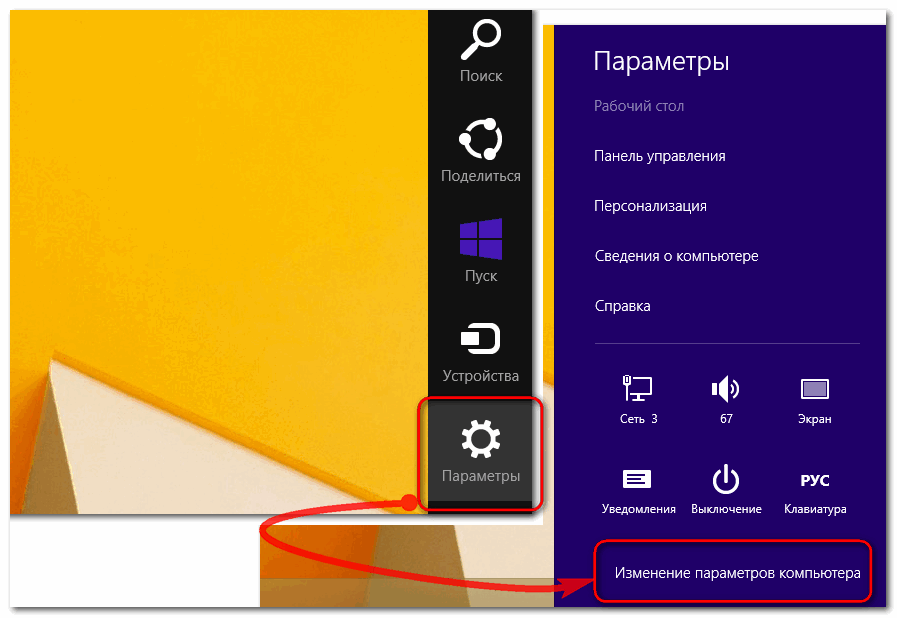
AT windows version 8.1 call wonder panel hovering the pointer to the right edge of the screen (or the keys Win + C), select, then click the link to change them.
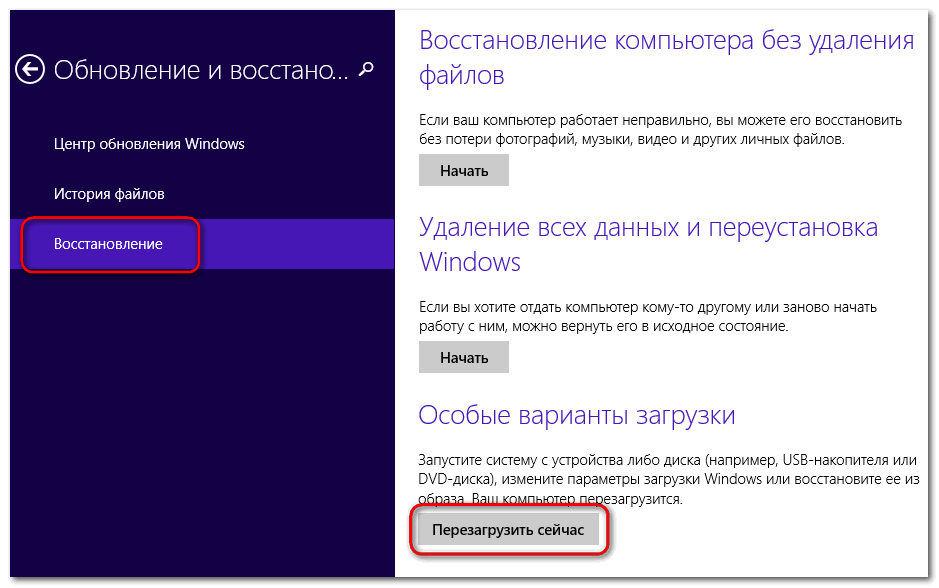
Go down to the tab, here we are interested in special options for downloading. We press "Reload Now".
For special boot options in Windows 10 we get a little different. Running a regular application is possible directly from the menu.
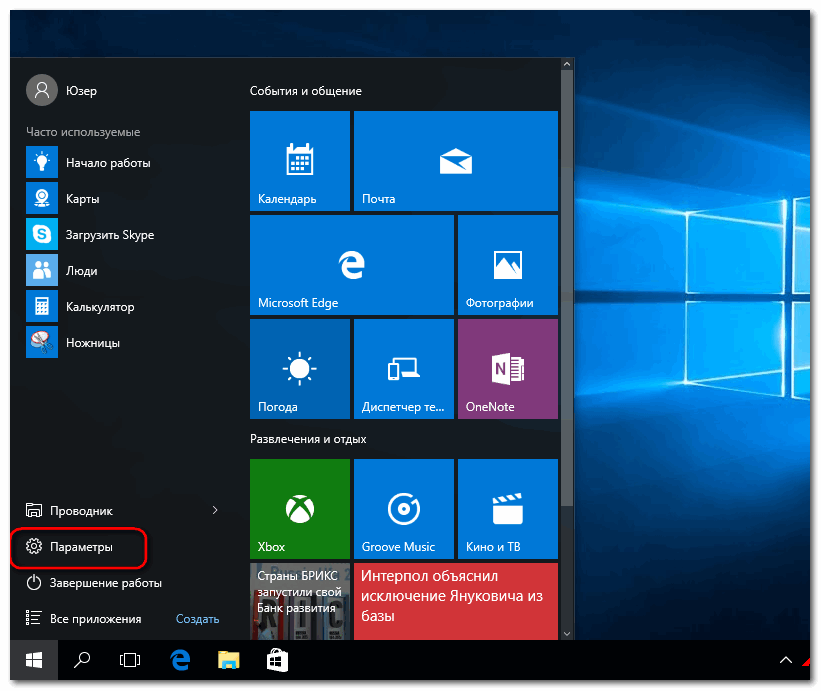
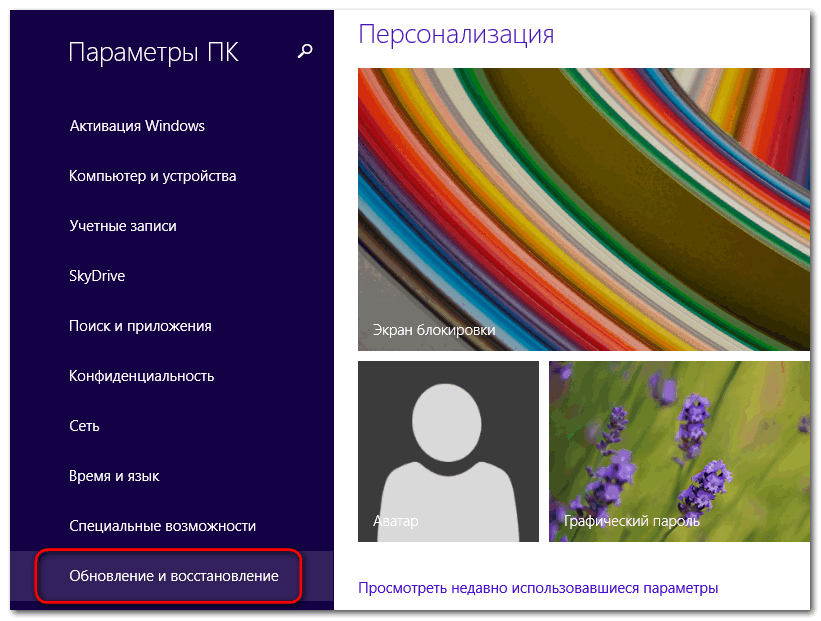
Go to the section updates and security.
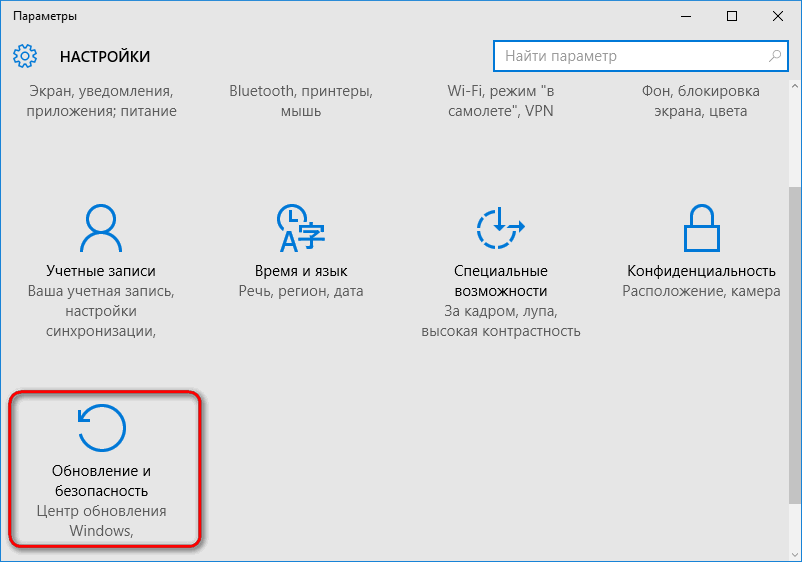
Switch to the tab and see below special loading options. To use them, press the button. "Reload Now".
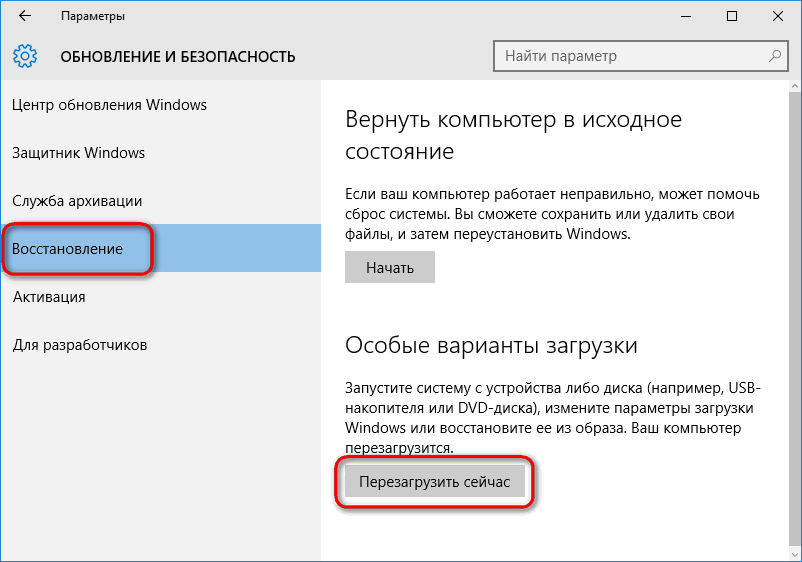
After rebooting in both cases - with both Windows 8.1 and Windows 10 - we’ll get into the action selection menu, which will lead to the system recovery environment in the future. This menu from the version of Windows 8.1 has consistently migrated to the new version 10, because all further actions for both systems will be identical. In the action selection menu click. Next, from the list of options, choose "Extra options".
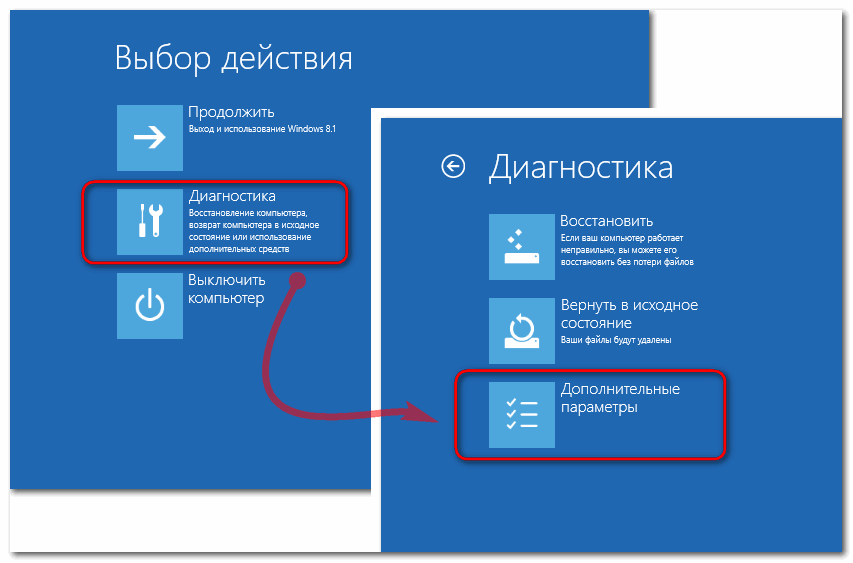
We are interested in the item.
Choose account and if she password protected, accordingly, we enter the password.

This will start the recovery wizard for the computer from the image. In the first window, you must either leave the default option to use the latest backup set, or specify a different copy in the second paragraph if there are several of them. We press
Again.
We press "Done" and agree to replace the existing data with data from the backup.
At the end of the process we reboot.
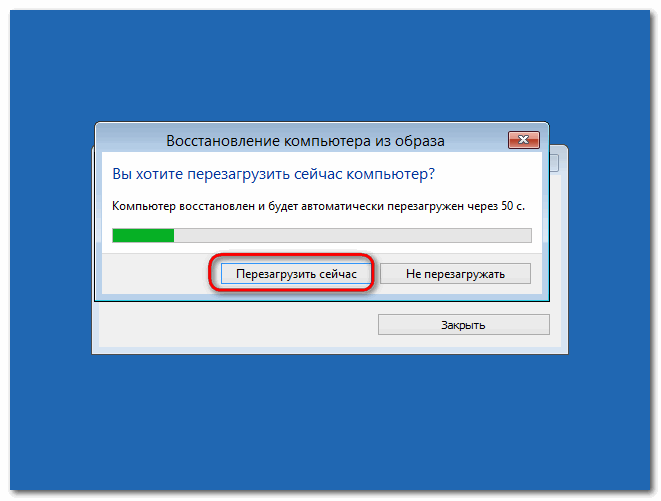
All - after a reboot, we can observe a workable system as it was at the time of the backup.
Restore Windows 8.1 and 10 if the computer does not boot
If the operating system has undergone a critical failure and does not boot, we will restore it from the backup image using the same recovery environment. But we get there with the help of the installation disk. An alternative way to get into the Windows recovery environment is by pressing the F8 key while the computer is booting - alas, not very convenient. F8 should be pressed before the Windows logo appears on the screen, and due to reduced system load, starting from version 8, not everyone can catch this moment from the first time the first time. And if you have an operating system installation disk at hand, it doesn’t matter if it is Windows 8.1 or 10, it’s easier to boot from it. With it, we will get into the recovery environment.
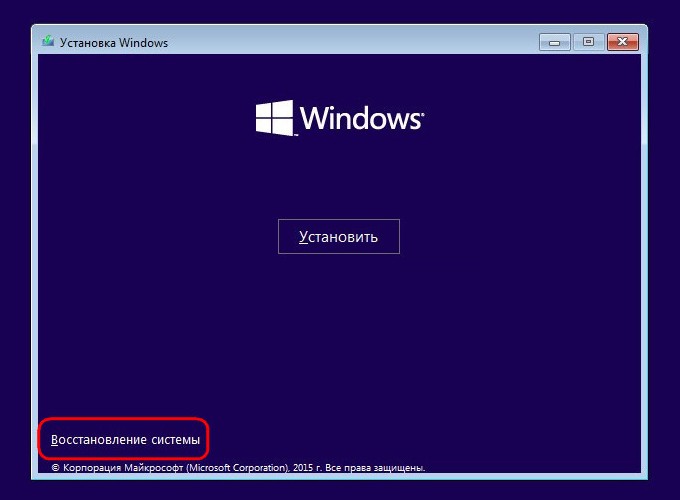
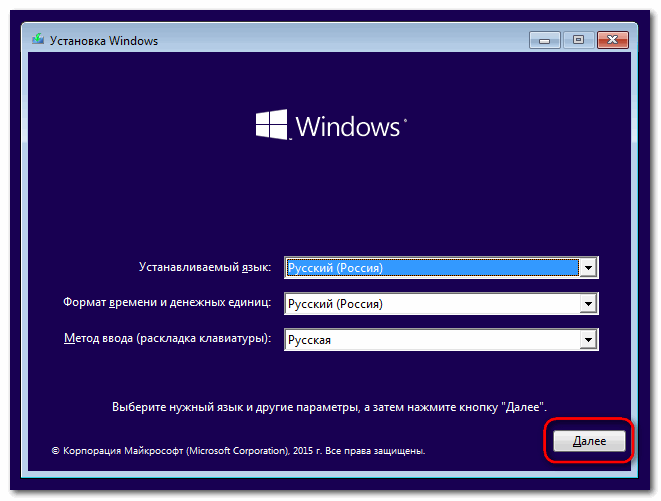
Insert the installation disk into the drive (or USB flash drive) , we assign in the computer BIOS the priority of their loading. In the language select window, click.
Then, instead of installing the system, click the recovery button below.
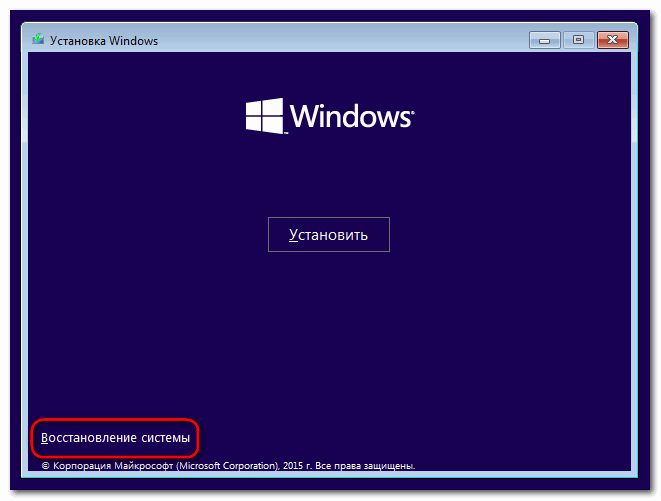
After that, we get into the action selection menu. Select the item and perform the above Windows restore process from the backup image.